
Gen3 Amsterdam Range
Rear rack assembly manual
-
1. Identify your bike frame
-
The frame size of your LEKKER Bike will determine what size stays you should use to install your rear rack.
50cm frame: use the large stays
56cm frame: use the medium stays
60cm frame: use the small stays -
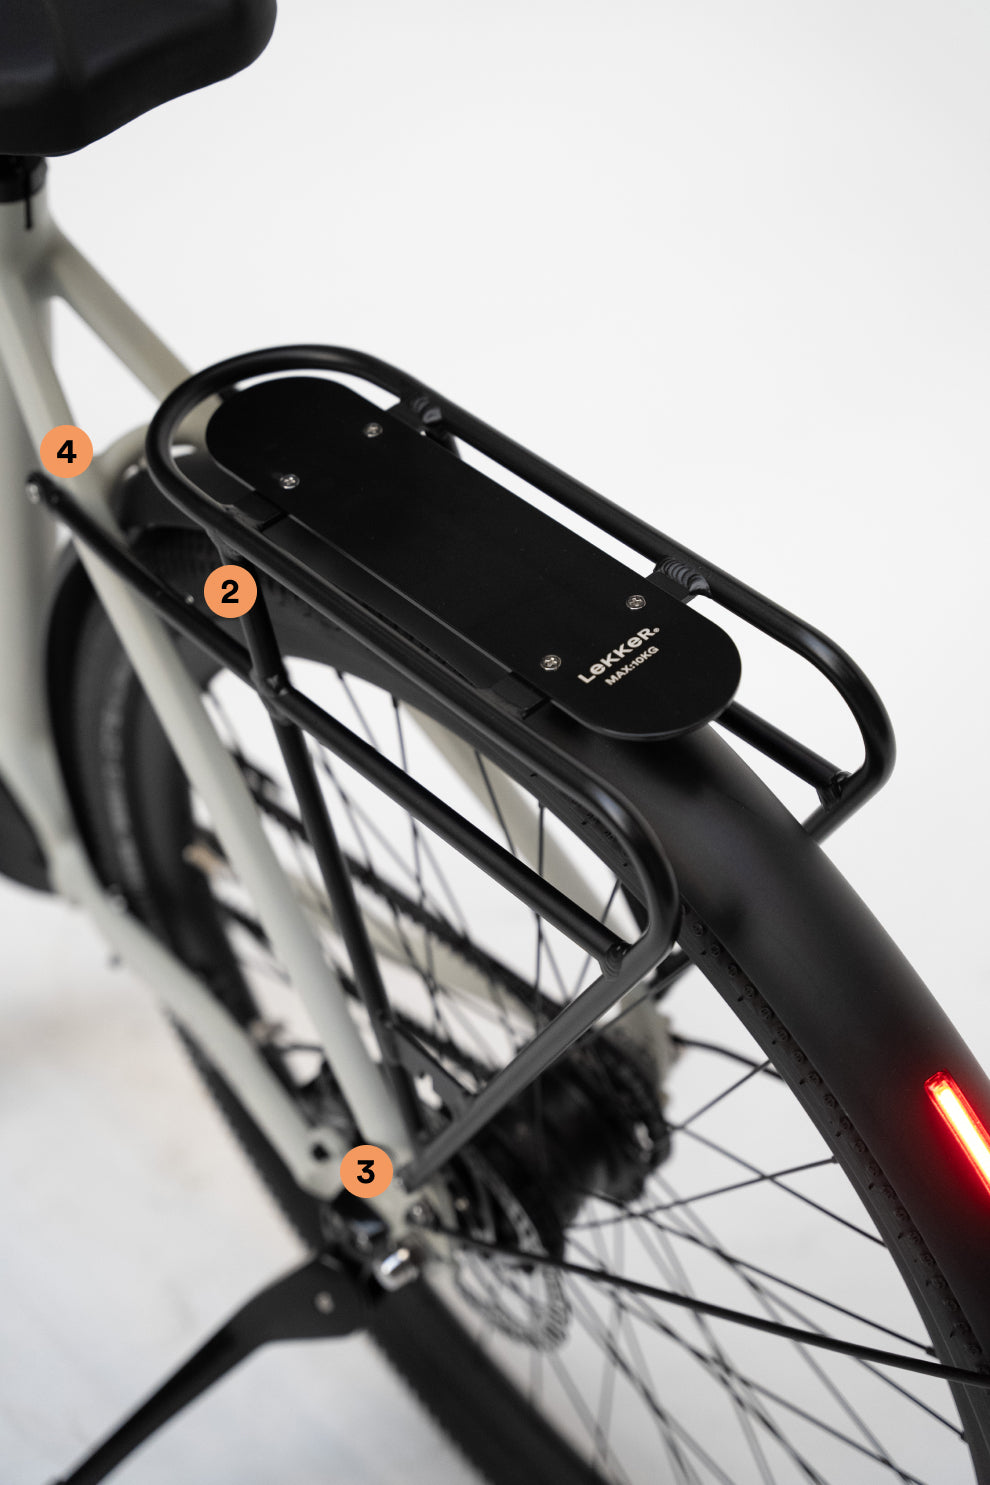
2. Attach the stays to the rack
- Using the 4mm allen key, attach the stays to the rear rack with the two M4 bolts. Make sure to mount the stays in the correct orientation, so that the end of the stay aligns with the threaded hole in the frame of your bike. Repeat on both sides.
-
3. Attach rack to frame
- Position the rear rack above the rear wheel on the bike, and align the holes on the rear rack with the threaded holes on the rear dropout of the frame. Attach the rear rack to the rear dropout by using the 5mm allen key and the two M5 bolts, ensuring to use one washer for each bolt. Do not completely tighten it, so you can align it in the final stage. Repeat on both sides.
-
4. Attach front stays to frame
- Attach the front stays of the rear rack to the seat stays of the bike, close to the seat post. Use the other two M5 bolts, ensuring to use one washer for each bolt. Repeat on both sides.
-
5. Align and tighten
- As the final step, tighten all the four M5 bolts by using the allen key while keeping the rear rack aligned and centerd with the rear wheel. Ensure that the top platform is horizontal.
What"s included in the box?
-
Rear Rack 1x
-
Allen Keys 1x 4mm & 1x 5mm
8-10 Spanner 1x -
Stays
-
For 50cm frame 2x
For 56cm frame 2x
For 60cm frame 2x -
M4 Bolt 2x
M5 Bolt 4x -
Washers 4x
-
Bungees 2x